One of the handy features of WordPress is its built-in revision control system. Automatically saving a full copy of every post, page or custom post type in the database while you’re editing, WordPress’ revision system not only frees you from worrying about losing your writing but also allows you to revert back and restore a previous version of your content if needed.
When used correctly, WordPress Post Revisions can take your content management workflow to a whole new advanced level. There are a number of interesting things you can try to unleash the full potential of Revisions. Let’s take a look at what are they and how you can do them!
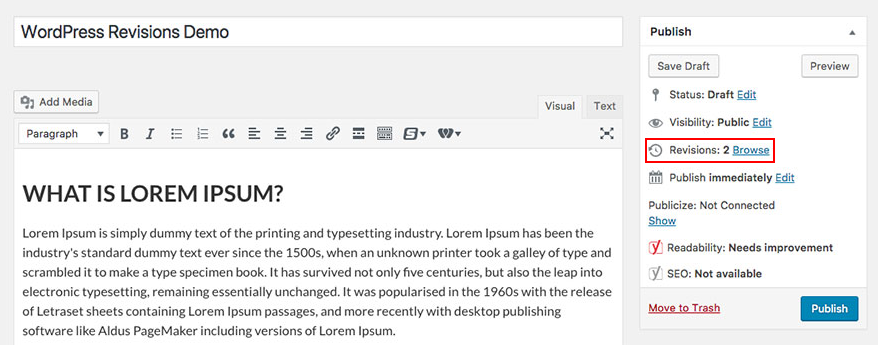
Since Revision control system doesn’t have its own menu in the admin sidebar, it is somewhat hidden in the WordPress Dashboard area. To access revisions for a particular post or page, you have to click either the ‘Edit Post’ or ‘Edit Page’ and look for the ‘Revisions’ option inside the ‘Publish’ box available right to the WordPress editor.

Clicking the ‘Browse’ link given next to ‘Revisions’, you’ll be able to access and compare revisions of the post or page that you’re editing. In case you’re unable to view ‘Revisions’ there, remember that this option will show up only if you have at least two different versions of the same post or page. If you’ve never made any changes to the post or page before, you won't be able to see it.
In addition to the Publish box, you can also access Revisions through the ‘Screen Options’ menu given on the top of the post edit screen.
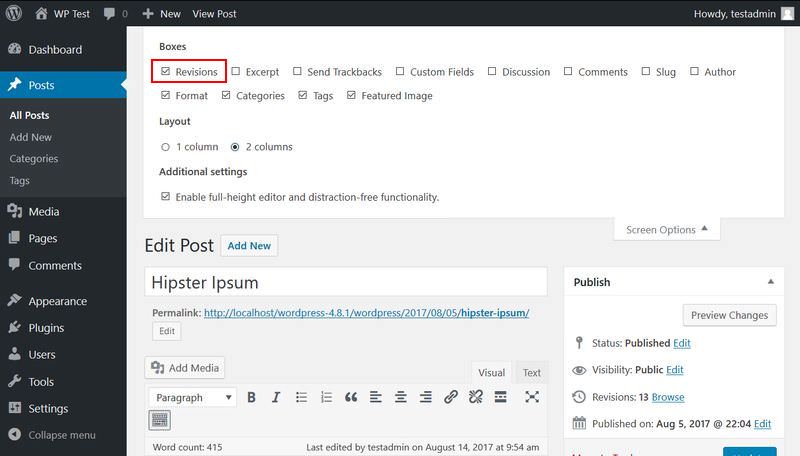
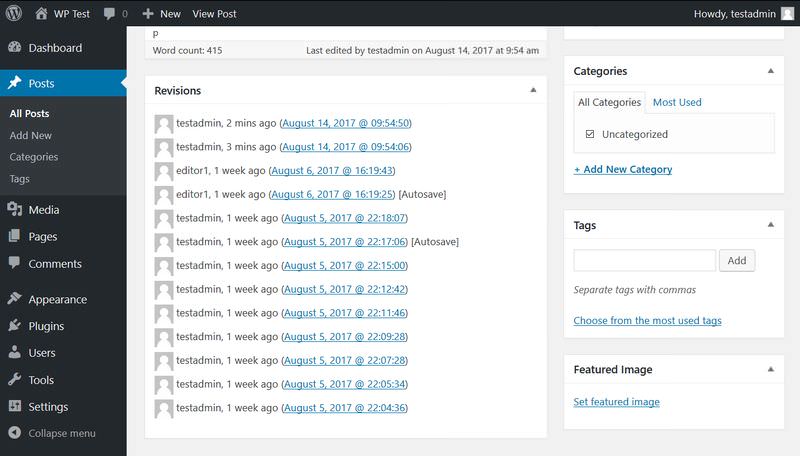
Just tick the box next to ‘Revisions’ and all previous revisions for that particular page or post in an extra box will start showing up below the post editor.
To compare any two revisions, all you need to click the ‘Browse’ link and you’ll then be taken to the revision management screen.
Here, by dragging the range slider available at the top of the screen, you can check what was added, what was deleted and what remained unchanged in each revision. Contents removed from the previous version are highlighted in red background, while any content added to the next version is highlighted in green background. You can also use the Next/Previous buttons to change the position of the slider.

One thing to note here is that WordPress by default allows you to compare two adjacent revisions of a post or page. If you want to compare any two revisions that don’t come after each other, you'll need to first check the ‘Compare any two revisions’ checkbox and then use the slider option to select any two revisions you want to compare with each other.
In terms of what you can do with a revision, you have only two options: you can either restore it or leave it as it is. To restore a revision, all you need to do is select that particular revision using the slider and then click the ‘Restore This Revision’ button.

Once you click the button, you’ll see the restored revision inside the WordPress editor, with a notification on the top of the screen saying ‘Post restored to revision…’ To make the restored revision permanent, however, you’ll need to either update the post or save it as a draft.

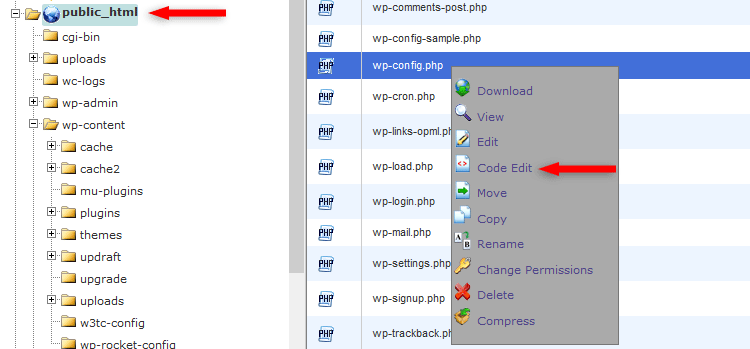
Revisions are enabled by default on every WordPress installation. If you want to disable them permanently, open your site’s wp-config.php file and look for the following line of code:
|
1 |
define( ‘WP_POST_REVISIONS’, true ); |
And replace the above value to false like so:
|
1 |
define( ‘WP_POST_REVISIONS’, false ); |
This will completely disable the post revision feature on your WordPress site. In case the above value is set to true and you still are unable to see the Revisions option on post editing screen, chances are your hosting provider has disabled Revisions due to performance issues. If that is the case, reach out to your hosting provider and ask them to enable the option.
Since there is no limit on how many revisions of a post can be stored, not limiting the number of posts revisions may add lots of pointless junk to your WordPress database. An increased database size not only causes problems like server slow down but also makes it very difficult for you to take the backup of your entire WordPress site. To avoid this, you can limit the number of revisions by changing the above value to a positive integer like so:
|
1 |
define( ‘WP_POST_REVISIONS’, 3 ); |
With the above line of code, WordPress will save only the three most recent revisions of a post to your database.
Freeing up as much space as possible on your WordPress database is always a great idea. To delete all of your previous post revisions, go to your site’s PHPMyAdmin and run the following SQL command:
|
1 |
DELETE from wp_posts WHERE post_type = “revision”; |
This SQL query will delete every post revision that was ever created. However, before you execute the above SQL query, it is highly recommended you take a full backup of your database as an added security measure.
Additionally, if you’re a seasoned WordPress developer, you can use the wp post delete command to delete all old post revisions using WP-CLI. Below is an example of a WP-CLI command:
|
1 |
$ wp post delete $(wp post list --post_type='revision' --format=ids) |
Taking advantage of the wp_revisions_to_keep filter, you can even control how revisions should be handled on a per post basis. This process requires passing in two parameters to the filter: the number of revisions you want to keep and the WP_Post object representing the post that you want to target. Here’s how you can do it:
|
1 2 3 4 |
add_filter( 'wp_revisions_to_keep', 'filter_function_name', 5, 3 ); function filter_function_name( $num, $post ) { return $num; } |
Revisions are also created by another WordPress feature called Autosaves. Enabled by default, the Autosave feature automatically saves a copy of your post after every 60 seconds. The sole purpose of Autosaves is to help you avoid losing your hard work in case of power goes out, browser crashes or Internet connection disconnects.
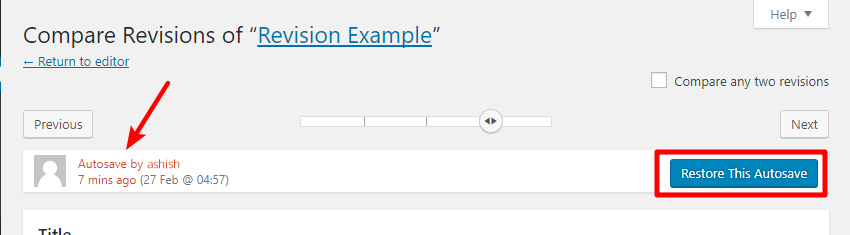
Since new autosaves overwrite the old ones every 60 seconds, there can only ever be one autosave per user for any given post - the main difference between Autosaves and Revisions. Besides, Autosaves are stored as a special revision type and don’t overwrite the actual post as regular revisions do. They are labeled as Autosave and can be accessed or restored through the revision management screen.
If you wish, using your wp-config.php file, you can change the default autosave interval to whatever value you like. However, you must define the new autosave interval in seconds.
|
1 |
define( 'AUTOSAVE_INTERVAL', 300 ); |
If you don’t believe in coding or editing your wp-config.php file, using a revision management plugin would be a better option for you. Some popular choices are WP Revision Master, Revision Strike, Better Revisions and WP Revisions Control. Need some more plug-ins? Visit this link to find all official revision-related WordPress plugins!
Comments are Closed