Creating a backup is, undoubtedly, the best way to ensure the security of a WordPress site against vulnerabilities and hackers. There are several reasons that can compromise your website security and make it prone to attacks. For instance, you may be using a theme from an external source that contains malicious code. Of course, it is important that you're using a theme made available by a trusted source. For example, D5Creation is a well recognized name in the online marketplace known for offering high-quality and secure WordPrerss themes.
But, the agenda of this article is not about discussing what causes a WordPress site hacked. Rather, we would be focusing on below two techniques to back-up WordPress database:
cPanel is a well known control board that is efficiently utilized by numerous number of web host features. The reinforcement highlight can be utilized to reinforce your MySql database. Try not to create a full reinforcement process, as these are entirely for documenting purposes and can't be restored by means of panel. Search for 'Download a MySQL Database Backup' and snap the name of the database. A *. gz document that will be downloaded to your neighborhood drive.
There is no compelling reason to unfasten this record to restore it. Utilizie the same cPanel program, skim to the gz document and transfer it. Once the transfer is finished, the base of the program will demonstrate dump complete. On the off chance that you are transferring to another host, you should reproduce the database client alongside the coordinating secret key. In the event that you change the secret key, roll out all the relating improvement in the wp-config.php record.
PhpMyAdmin is defined as one of the programming styles that efficiently uses your WordPress database:
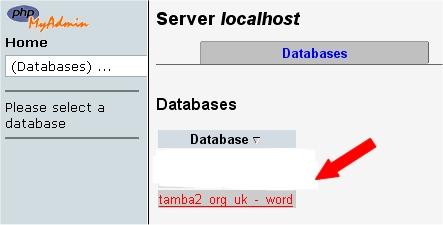
Next, click on the database name; else you have another option to click on the WordPress database option, if you find that you have several database options available.
The next section simply allows you to access all the tables within the WordPress database section.
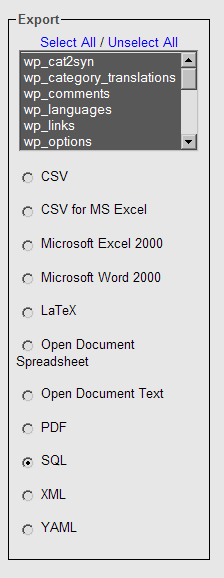
Go towards the left box at the top of the Export section and here you will find that all the tables in the database that you saved and selected previously..
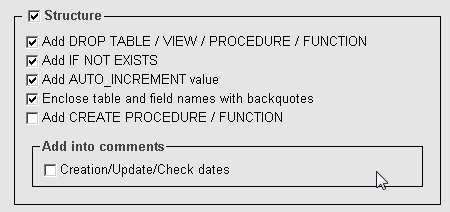
Tick the following boxes:
Working with the DATA box section, you can access the Complete inserts and Extended Inserts option that are mostly used for changes to the output style.
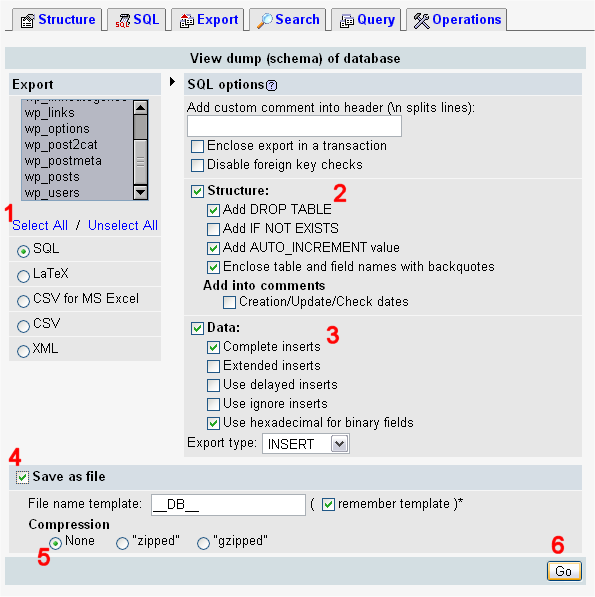
Tick on 'Save as file' menu and leave the template name as it is.
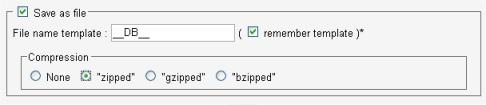
This above diagram shown, allows you to click on 'Go' menu and you will be prompted for a file to proceed to download.
Save that file to your desktop for future use. Depending on your database size and speed, it may take a few moments.
Now here you have completed your WordPress database backup process.
You can download your WordPress backup file for future purpose, if you want it.
If your hosting provider is working with the cPanel hosting control panel, then you should follow these simple steps to develop your WordPress username as well as database. Below here is a more simplified guide for using cPanel to design your database:
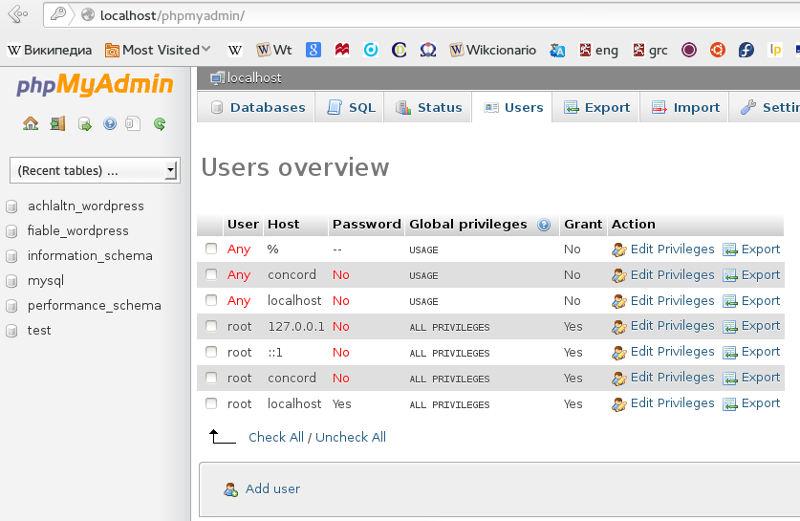
In the event that your web server has phpMyAdmin introduced, you might take after these directions to create your WordPress username and database. On the off chance that you are dealing with your own PC, then on most of the Linux operating systems conveyances you with an introduction to PhpMyAdmin naturally. In the event, where a database is identified with the WordPress, does not as of now exist in the Database dropdown list on the left, then it is always good to create one:
Pick up a name for your WordPress database: "Wordpress" or "site" are great, yet most facilitating administration processes that will require a name starting with your username and an underscore. In this way, regardless of the possibility that you take a shot at your own PC, we exhort that you check your facilitating administration necessities so that you can tell them all equally and have the capacity to exchange your database without alteration.
Enter the created database name in the Create database field and pick up the best assemblage for your dialect and encoding. Much of the time, it's an ideal to pick up in the "utf8_" arrangement process and, on the off chance that you don't discover your dialect, to pick "utf8mb4_general_ci"
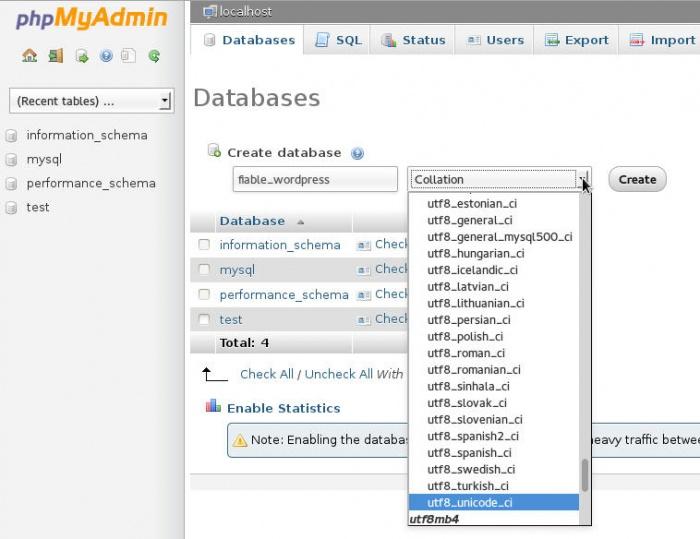
After naming the database and choosing the collation, click on the Create button.
Comments are Closed