
Did you know that 29.3 percent of all the websites available online use WordPress as their CMS? The stats provided by W3Techs is pretty impressive - and clearly shows how convenient WordPress could be both for experienced web users and for the ones that are just starting.
If you’re looking for the right CMS to start a blog, WordPress could be the perfect option. It’s widespread and has a lot of plugins that allow making the most of your blogging experience. It also has a lot of other amazing resources, both free and paid, allowing you to customize your blog according to your budget and your needs.
For example, a beginner blogger could pick a free Innovation Lite theme by D5 Creation, while a more experienced one could install a Business Line theme from the Pro collection. And these two themes are just an example - you can find more of them on D5 Creation website and anywhere online. Keep in mind that all the D5 Creation themes are coded in accordance with all the WP standards and so work with all the standard plugins without any issues.
But your work doesn’t end with picking the right name and hosting for your blog and with installing theme and plugins. This might seem like the most challenging part - but actually, it’s just the beginning.
No one is able to succeed in blogging without offering some valuable and fresh information to their audience. So if you take blogging seriously, you should choose your niche wisely, write a proper content strategy - and learn how to write and publish posts in WordPress.
You can do so either in any text editor of your choice or in WordPress itself. After all, it’s not where you write that matters - it’s what you write.
We’re not going to get into details about how to craft a strong content strategy for your blog: there are plenty of reliable websites where you can find this information. Choosing a niche or not is also up to you. But besides that, there are some general recommendations on blog post writing that could apply to anyone.
If you have a content plan already, all you need to do is to pick the first topic you planned to write about. If you don’t have any content plan, think about which topic could be a good start for your blog.
Keep in mind that if you aim for the exposure, it’s always better to choose a more narrow topic rather than write a detailed guide that is, however, covered in details by other bloggers.
An outline is a great supporting tool for any blogger. It allows you to see the structure of the post and the impression this post could make before you even start writing. It also ensures that you won’t forget to mention anything and that you don’t overdo with the arguments and statements.
For example, if you plan on writing a small post and then see that an outline seems to look too big, you could either cut off some parts of the post or decide to leave it like that (or turn into the series of posts).
Writing headlines for posts is an art many beginner bloggers have yet to master. Lucky for you, there are plenty of online tutorials that could help you with that. We also want to give you some general recommendations.
A strong headline should be:
It never hurts to over-emphasize the last point. There are plenty of bloggers who write catchy titles that, however, have nothing to do (or little to do) with the post. This is called click-baiting and you should avoid this at all costs as it’s one of the easiest ways to make the readers annoyed and frustrated.
The keywords are extremely important as they help the search engines to find and rank your blog posts. Of course, being a beginner blogger, you probably don’t know how to work with keywords - but that’s okay. There are plenty of SEO tools for WordPress to help you.
Also, keep in mind that you shouldn’t include too many keywords into your posts, making them unreadable. It’s always better to settle with a smaller number of keywords - three, for example.
Even if you have enough knowledge to write a post completely on your own, adding a couple of links to other reliable sources definitely won’t hurt. This is good for SEO and also makes your posts look more impressive - after all, this way it seems that you did your research well enough.
You could backlink websites containing some valuable resources, backlink the statistics you mention, include quotes mentioned on other websites and blogs, and so on. And while you might look for such links and add them to your post right in the writing process, for some bloggers it would be much easier to prepare them in advance (maybe even adding to the outline).
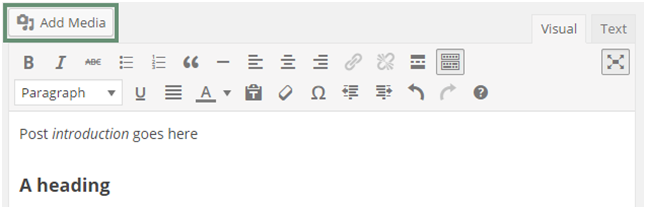
The images are great for illustrating your point of view and attracting the attention of the visitors, so you should consider adding them to your posts. In some cases the choice of images is obvious - for example, you can take your own pictures or screenshots while writing a tutorial. In some cases, however, you might need to use someone else’s images - for example, when you aren’t able to take your own photos or draw your own pictures (or don’t think they would be a good illustration for a certain topic).
In those cases, you could turn to free image stocks like Pixabay for help. Just be sure to mind the copyrights and use the images that are allowed to be used for free.
After you finish with the preparation, all you’re left to do is to write the post. And after you do so, another important part of the work will begin - the publishing itself.
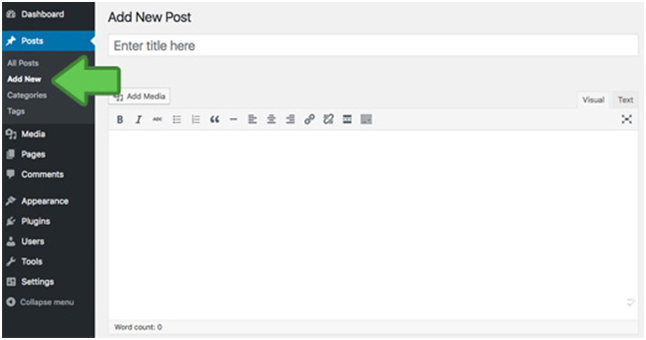
While the WordPress is pretty easy to handle, you might need a bit of guidance at first. So if you want to publish a post, here’s where you should start.
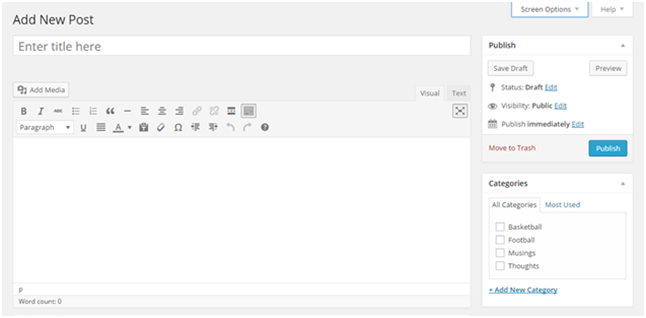
However, if you added some plugins before, they could change the appearance of the screen a bit (or a lot).
Now, once you’ve opened the screen, there are two options for you:
In the first case, mind the formatting. While the WordPress generally preserves the view of the post written in another text editor, there still might be some details that would look slightly off. Doublecheck the links, the tags, the size of the headlines, and so on. If something doesn’t work in the visual edition of the posting box, switch to text one and try to do all the formatting with the help of HTML tags.
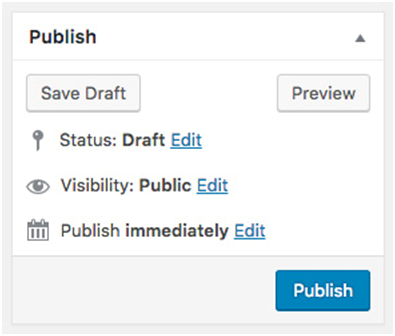
In the second case, be sure to save your post not only after it’s finished but in the process as well. The WordPress usually saves the posts automatically, but it won’t hurt to click the «Save draft» button an extra couple of times to ensure that your progress won’t be lost.
Keep the link in mind as well. Though WordPress does generate automatic links for all your posts, they aren’t always good for SEO and easy for you to use. Therefore, we recommend you to read about the permalinks in WordPress and to try editing an URL of your future post accordingly. The URL is highlighted yellow in this picture.

After you do so, you’ll see the media uploader popping up in the window. All you need to do then is to click on the «Select files» button and select the images you want to be uploaded and added to the
post.
Keep in mind that if you do want to do some basic editing, that’s totally possible. WordPress has some image editing tools that are quite basic but also easy to use and understand.
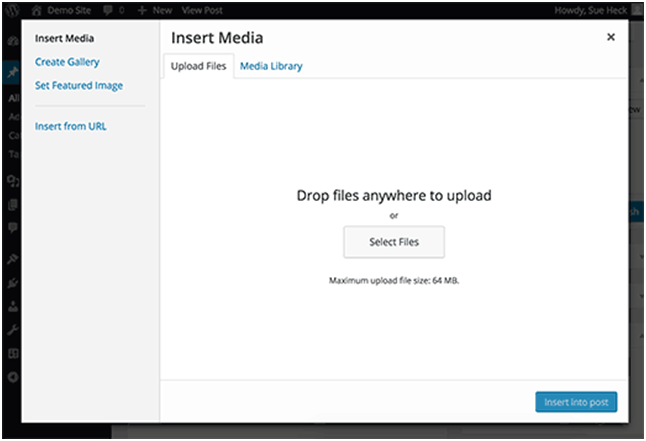
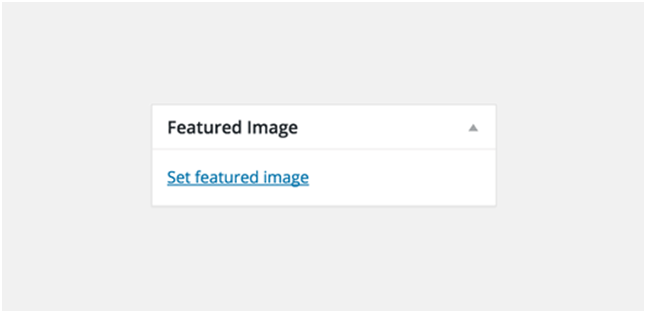
Also, keep in mind that this tool is used for adding images to the body of your post only. If you want to add the featured image as well, you will be able to do it later.
So if you want to do this, you can find the appropriate boxes on the right, below the publishing box.

Then look for the featured image box, which is usually placed on the right on the post edit screen. Click «Set featured image» - and you’ll see the popup window similar to the ones you’ve already used during ordinary image upload.
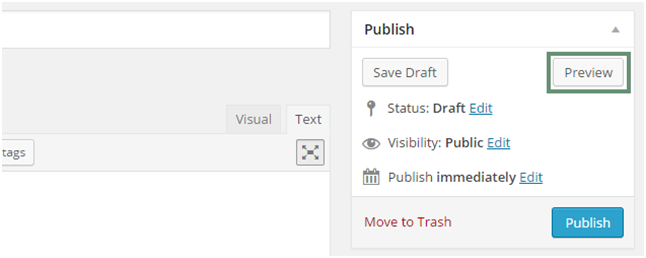
While previewing, check the formatting again, ensure that all the links are displayed as ones. Pay attention to the images as well: see if they are placed right, if they are resized properly, and so on. And after you do so, hit «Publish» - and celebrate your first published post!
So, these are all the basics you need to know to write and publish your first WordPress post. Of course, they are still just the basics and you will need to do more research if you would want to make the most out of your SEO, for example. However, even if you won’t start doing so from your first post, that’s completely okay. It’s always better to start and learn in the process than to postpone the start until you learn everything.
So we hope that these tips will help you start your WordPress blog successfully and wish you good luck with that!
Comments are Closed